

How To Access Files On External Hard Drive Windows 10
You've found an former difficult bulldoze from another computer and desperately want to know what's on it. It can be fun to take a trip down memory lane and observe old data that y'all've completely forgotten virtually, only getting old drives to work with new Windows ten computers can be tricky.
In this article you'll learn how to admission files on an sometime difficult drive with your Windows 10 PC.
What Type of Drive Is It?
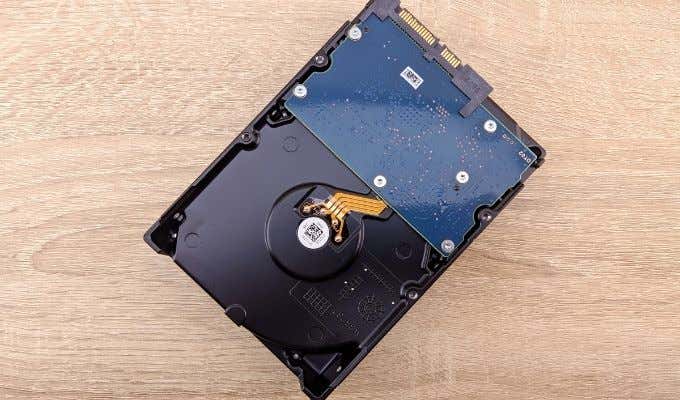
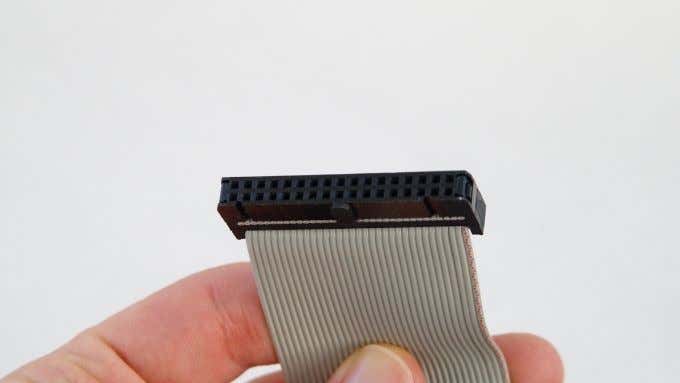
Before you do anything, yous need to identify the type of hard drive to which yous have access. Odds are the drive will be ane of two types. Older drives might use the IDE (Integrated Drive Electronics) PATA (Parallel AT Attachment) standard with a connector that looks like this:
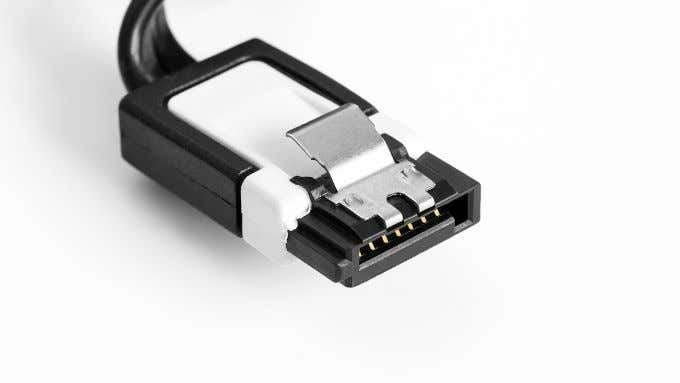
More than modernistic drives are likely to have a SATA (Serial AT Attachment) connector like this:
Depending on the blazon of computer you lot take, you may need both information and ability cable converters for these drive types then that yous computer can talk to them.
Yous may also have either a 3.5" or 2.5" drive. The smaller 2.5" drives don't require special connectors if they are SATA, simply if you take a 2.five" PATA drive you need the correct adapter, since the pinout for these drives are dissimilar to the desktop versions.
These laptop 2.5" PATA drives use a special 44-pin connector that's physically smaller than the desktop version, and then keep that in mind when looking for hardware to connect information technology to your system.
Connect the Drive Internally
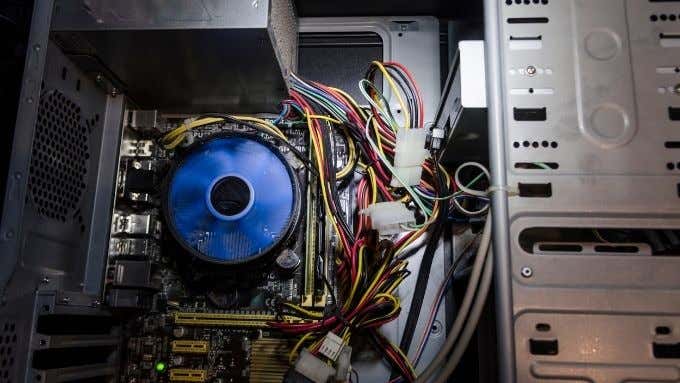
If you accept a desktop computer, the nigh straightforward way to access files on an onetime hard bulldoze with your new Windows 10 computer is to install it every bit an additional drive. You lot don't need to do this permanently, just slide off the side panel of your desktop machine and connect it using any gratuitous ability and data cables available. Merely install the drive while your computer is off!
If you have a computer without any IDE PATA connectors for such a bulldoze, you'll need to purchase a PATA to SATA converter. Also, keep in mind that IDE PATA drives have a jumper arrangement on the back, where you must physically move a jumper to choose 1 of these three options:
- Principal: where the drive is connected to the final PATA connector on the cable.
- Slave: where the drive is continued to the secondary connector in the middle of the ribbon cable.
- Cable Select: where the drive tries to figure out which connector it'due south on automatically.
If you're using an adapter to SATA, usually either Chief or Cable Select will work simply fine.
If y'all're using a laptop, we don't recommend installing the drive internally (assuming yous have a compatible bay) unless you really want to use it permanently. It's far too much hassle to open a laptop to install a bulldoze y'all'll only use temporarily. Instead, y'all should consider an external connection option.
Connect the Drive With an External Adapter
Whether you have a desktop or laptop estimator, using an external adapter is the easiest way to connect an old drive to your new Windows 10 estimator. The most common type converts the drive connection to a USB connection, providing both data and power in ane convenient package.
There are 2 types of external USB drive connector. One is a total enclosure, converting an internal bulldoze to an external drive for long-term use. The other type of connector strips abroad the enclosure entirely, leaving only a cablevision and connector. This is perfect if you have multiple drives to check or just want to temporarily access a drive to transfer data.
If the Drive Doesn't Testify
If you're trying to admission files on an old hard bulldoze and the drive doesn't show up as expected, in that location are a few bones troubleshooting steps you lot can have to resolve the event:
- Is the jumper set correctly on IDE PATA drives?
- Check that the data and ability cables are correctly seated and undamaged.
- Does the drive spin upward or make whatsoever noise at all?
Sometimes external USB drives don't show upwards simply because of drive letter conflicts or other rather basic reasons. Our article External Hard Drive Not Showing Up in Windows or OS 10 has a few tricks yous can attempt.
Taking Ownership of Files
Once you have the drive connected to your computer correctly, it will announced on your organization just similar whatever other drive. Equally long as it's in a format that Windows can understand, y'all should see all the files and folders stored in the drive.

Nonetheless, you might run into an upshot where Windows tells you that you don't take permission to admission the files and folders on the drive. The solution might be as elementary every bit granting administrator access if requested, but in some cases you demand to have ownership of the files. This is a security feature of Windows that prevents ane user from accessing or messing with files that belong to another user.
Don't worry, yous don't need elite hacker skills to crack this item lock. It takes simply a few moments to change the owner of a file or binder. Caput over to How to Change Ownership of a File or Binder in Windows and y'all'll have access to those files in no fourth dimension.
Signs the One-time Drive Isn't Working Properly
When left in storage for a long time or if it'south been run for an extended corporeality of time, a mechanical hard bulldoze can develop faults. If the bulldoze seems to be alive, merely takes an impossibly long time to transfer data, or makes a loud clicking noise, that could be a sign that it'south on it's fashion to the hard drive afterlife.
If your difficult drive contains vitally important information, you might want to invest some money in professional information recovery. Alternatively, How To Extract Files From a Dead Difficult Bulldoze has some ideas of how to go data from a expressionless difficult bulldoze.
Retrieve to Check Your Boot Order
If the drive y'all've extracted from the quondam motorcar happens to be a system bulldoze, it tin can happen that the new computer tries to boot from the old disk! That apparently is not going to work very well, so if that happens y'all should alter the boot lodge to ensure you boot from the correct disk.
This is mostly a problem for internal disk installations. If you're using USB just expect until y'all're booted into Windows before connecting the bulldoze.
Dispose of Drives Properly
Once you've rescued the data from the one-time bulldoze, are you still going to use information technology? Some former drives can all the same do duty as a repurposed external drive or secondary internal drive. However, most are going to be obsolete or too erstwhile to be trusted. Which means yous'll probably want to throw it away.

However, earlier you do that, be sure to read Wiping a Hard Drive in 4 Easy Steps as well as 5 Tools That Can Permanently Destroy Your Data For Every Major Bone. To ensure that you don't accidentally leave individual information out there for anyone to discover.
As well, don't merely chuck your bulldoze in the trash. Do a quick web search for your nearest e-waste facility and have them there instead.
Do not share my Personal Information.

How To Access Files On External Hard Drive Windows 10,
Source: https://helpdeskgeek.com/windows-10/how-to-access-files-on-an-old-hard-drive-with-windows-10/
Posted by: horowitzwaston.blogspot.com
0 Response to "How To Access Files On External Hard Drive Windows 10"
Post a Comment